> ## Documentation Index
> Fetch the complete documentation index at: https://docs.rafftechnologies.com/llms.txt
> Use this file to discover all available pages before exploring further.
# Create a Kubernetes cluster
> Launch a managed Kubernetes cluster from the dashboard in 10–20 minutes
Updated August 24, 2026
Create a cluster with one or more worker pools. Provisioning takes 10–20 minutes; you can watch every step in the cluster's Activity feed.
## Before you start
* An account with billing enabled and a project to put the cluster in
* A rough idea of the workload size — you can [scale pools](/products/build/kubernetes/quickstart-guides/scale-a-node-pool) any time
## Steps
In the dashboard, go to **Kubernetes** and click **New cluster**.
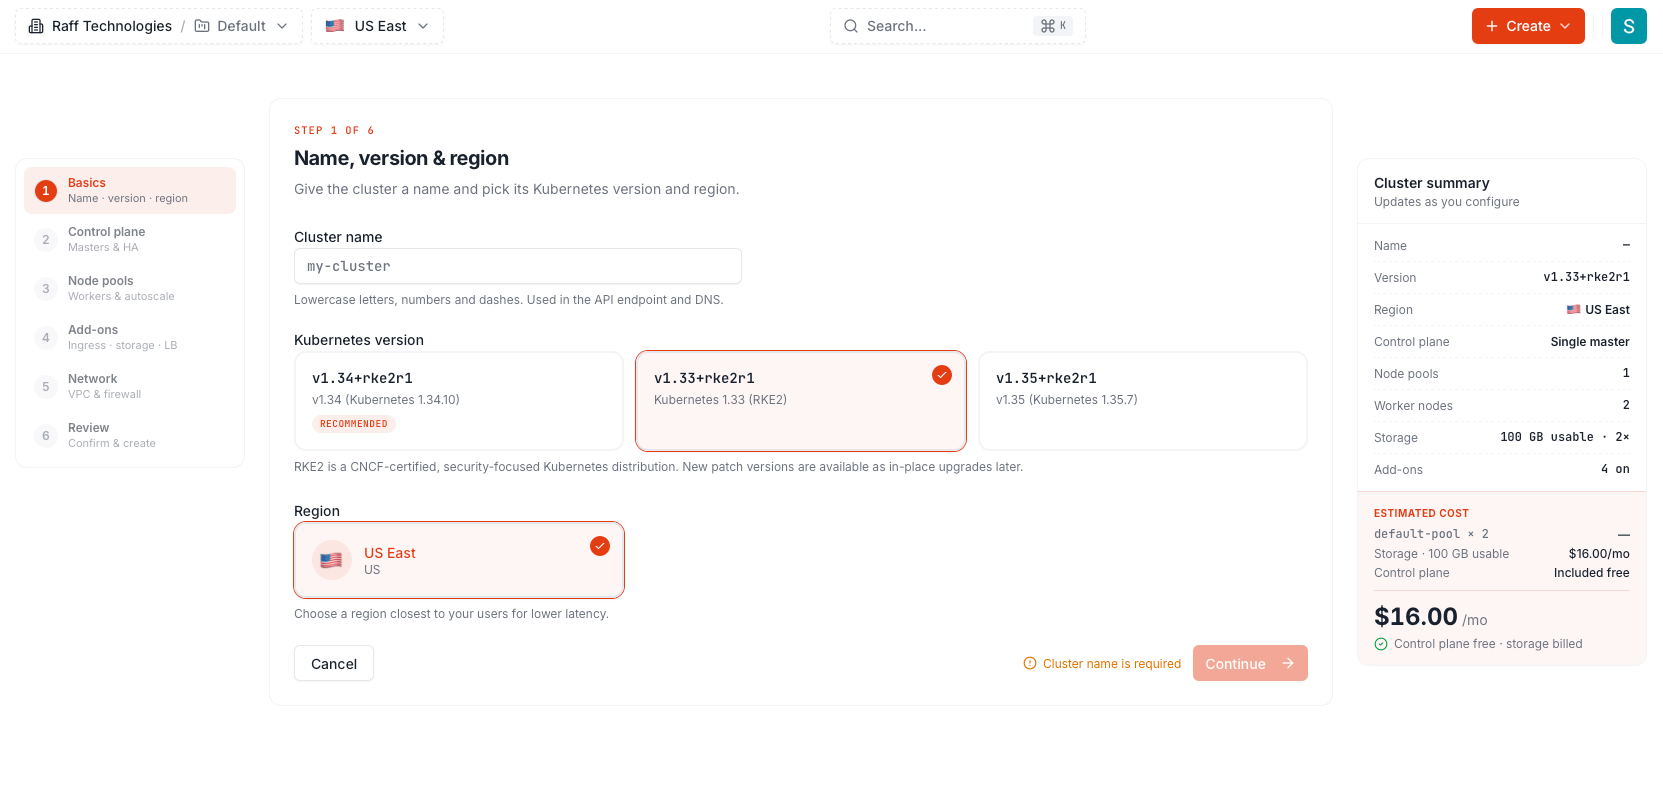 Names are 1–63 lowercase letters, digits or hyphens, unique in your account. Leave the version on the default unless you need a specific one.
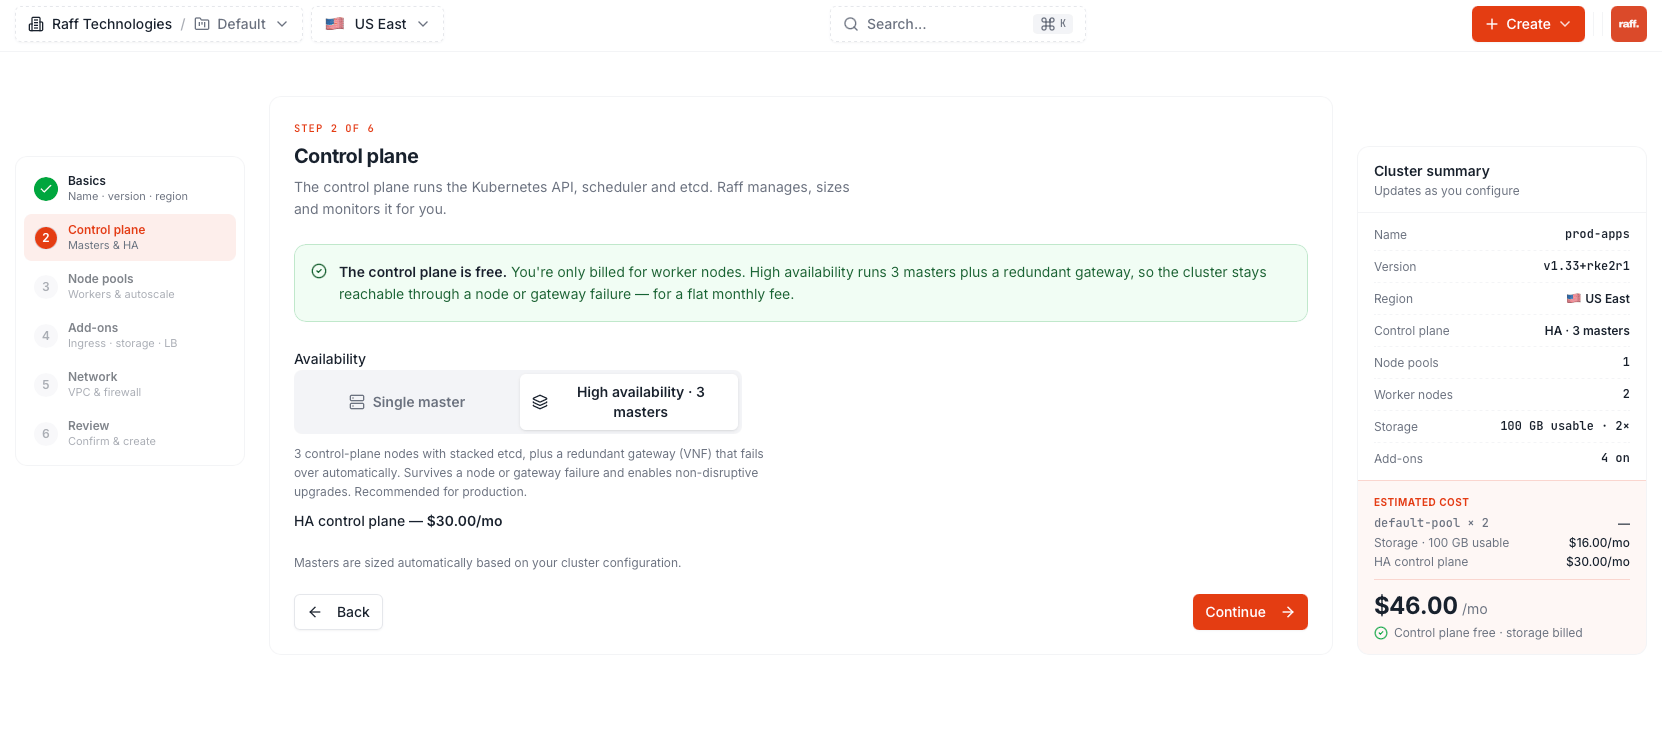
The standard control plane (1 node) is free. Pick **High availability · 3 masters** for \$30/month — recommended for production. See [Control plane & HA](/products/build/kubernetes/concepts/control-plane-and-ha).
Names are 1–63 lowercase letters, digits or hyphens, unique in your account. Leave the version on the default unless you need a specific one.
The standard control plane (1 node) is free. Pick **High availability · 3 masters** for \$30/month — recommended for production. See [Control plane & HA](/products/build/kubernetes/concepts/control-plane-and-ha).
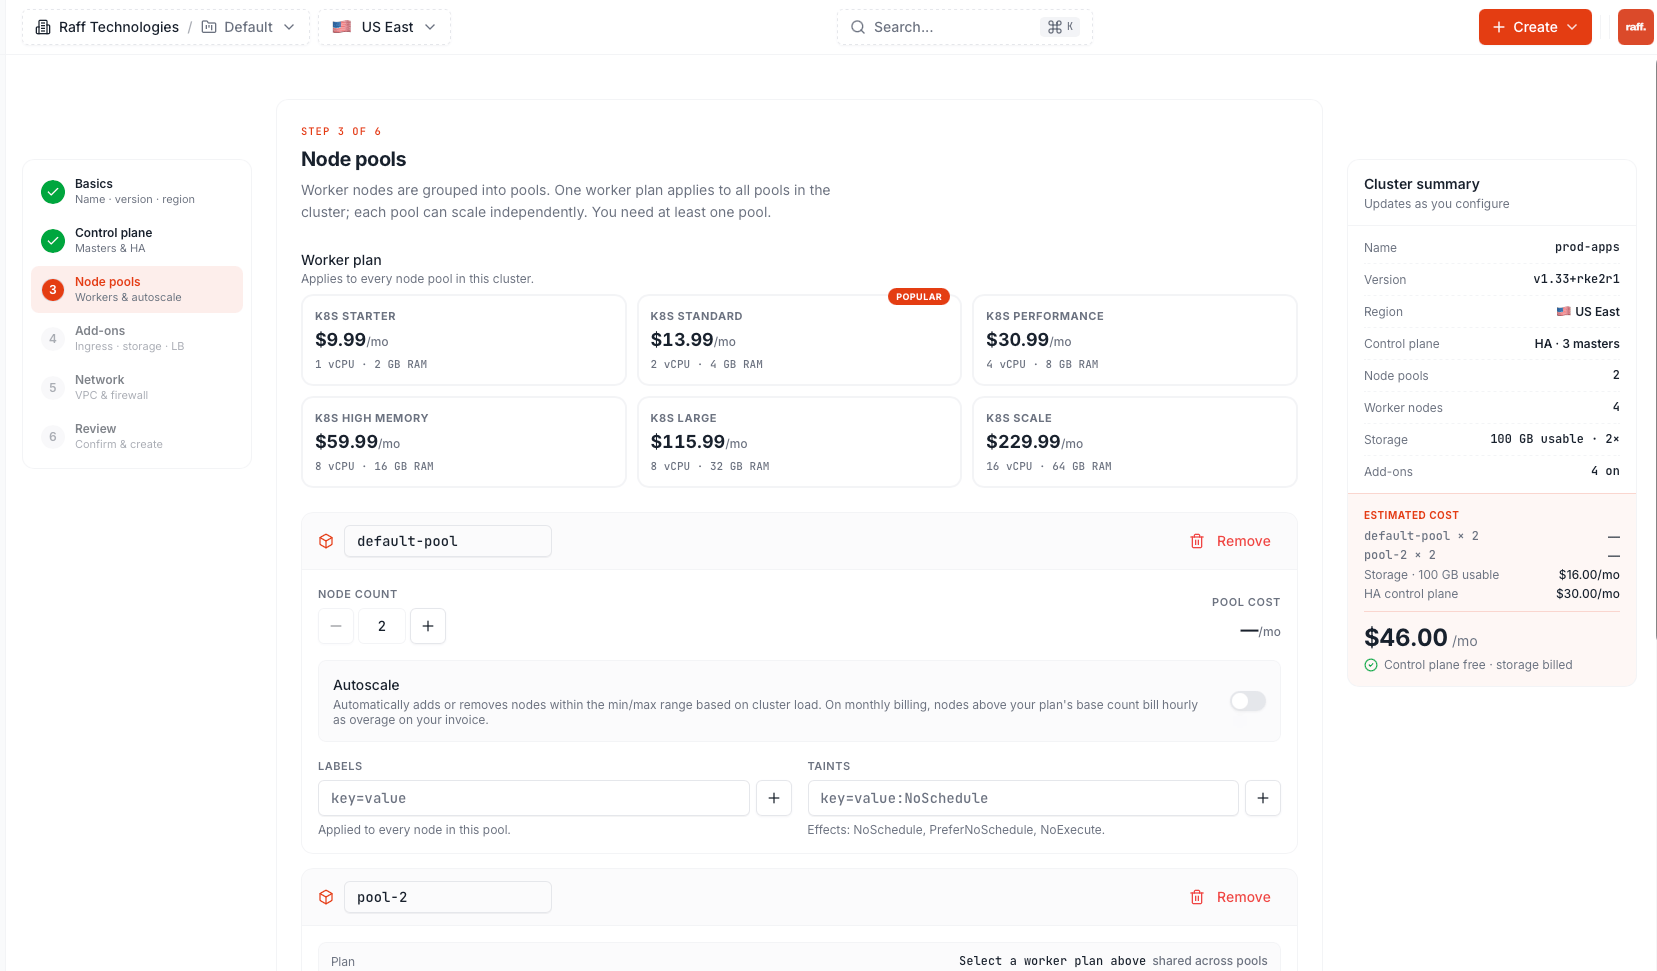
 Pick a worker plan and node count (2–20) for the first pool. Add more pools for mixed workloads, set labels and taints per pool, and enable **autoscaling** with min/max bounds if you want the cluster to size itself.
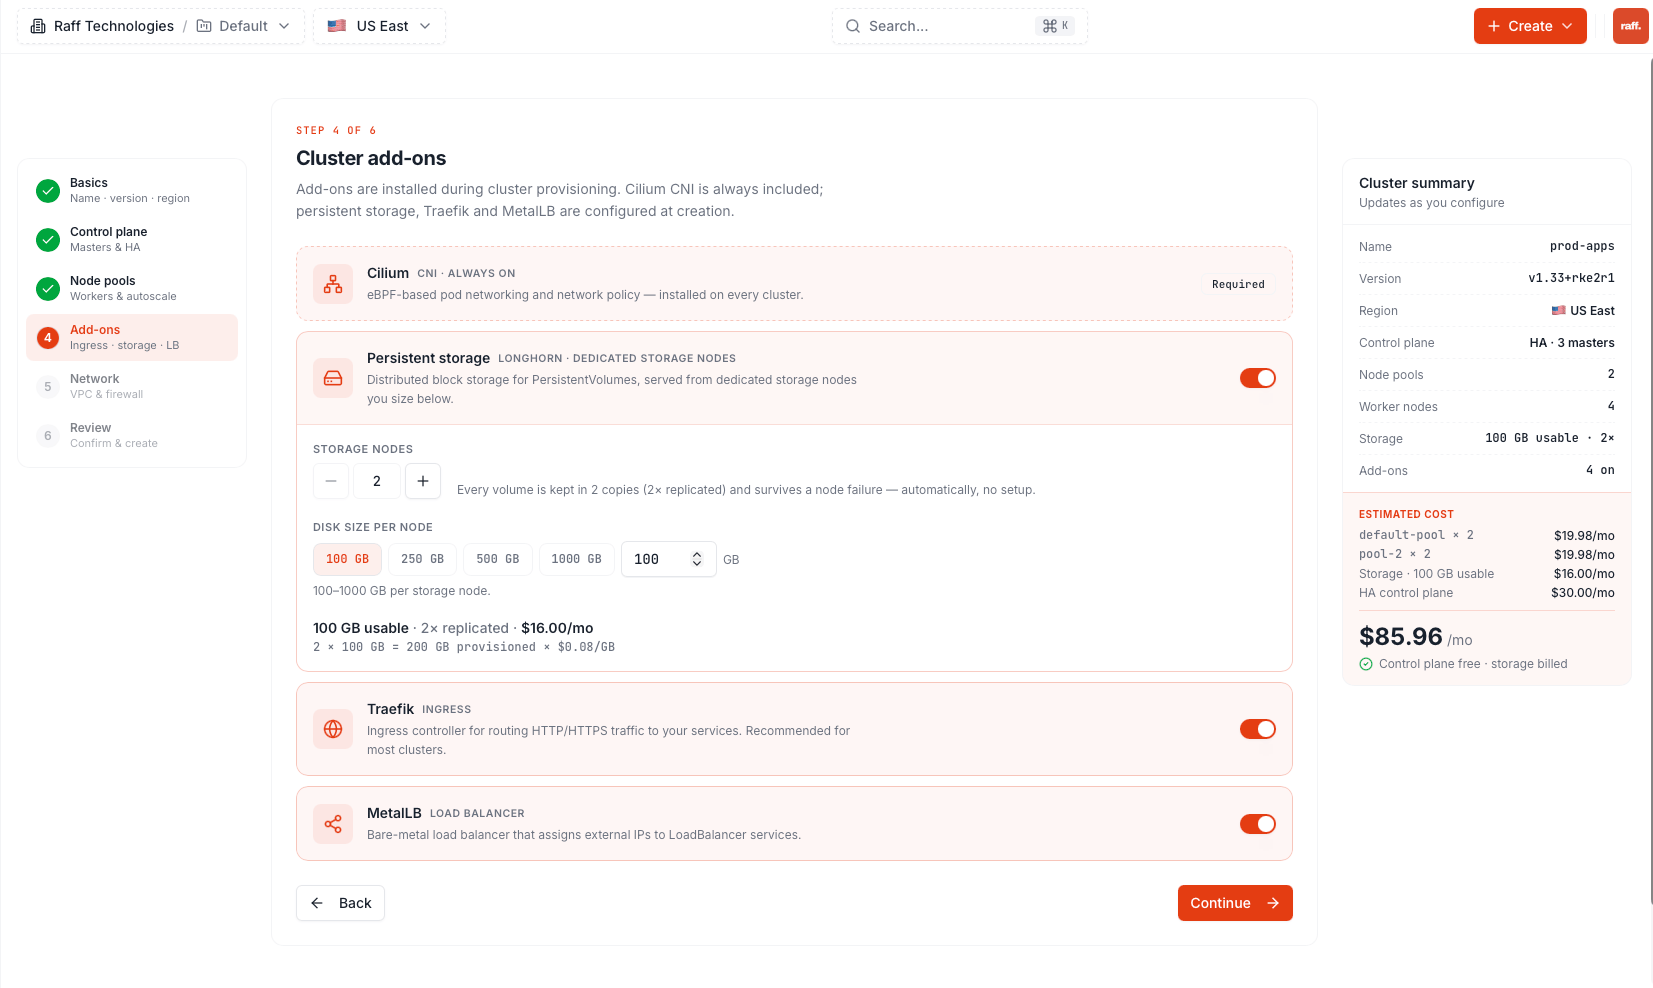
 Cilium CNI is always included. Optionally enable **persistent storage** (Longhorn on dedicated storage nodes, sized here), **Traefik** (ingress) and **MetalLB** (LoadBalancer services). Defaults are fine for a first cluster.
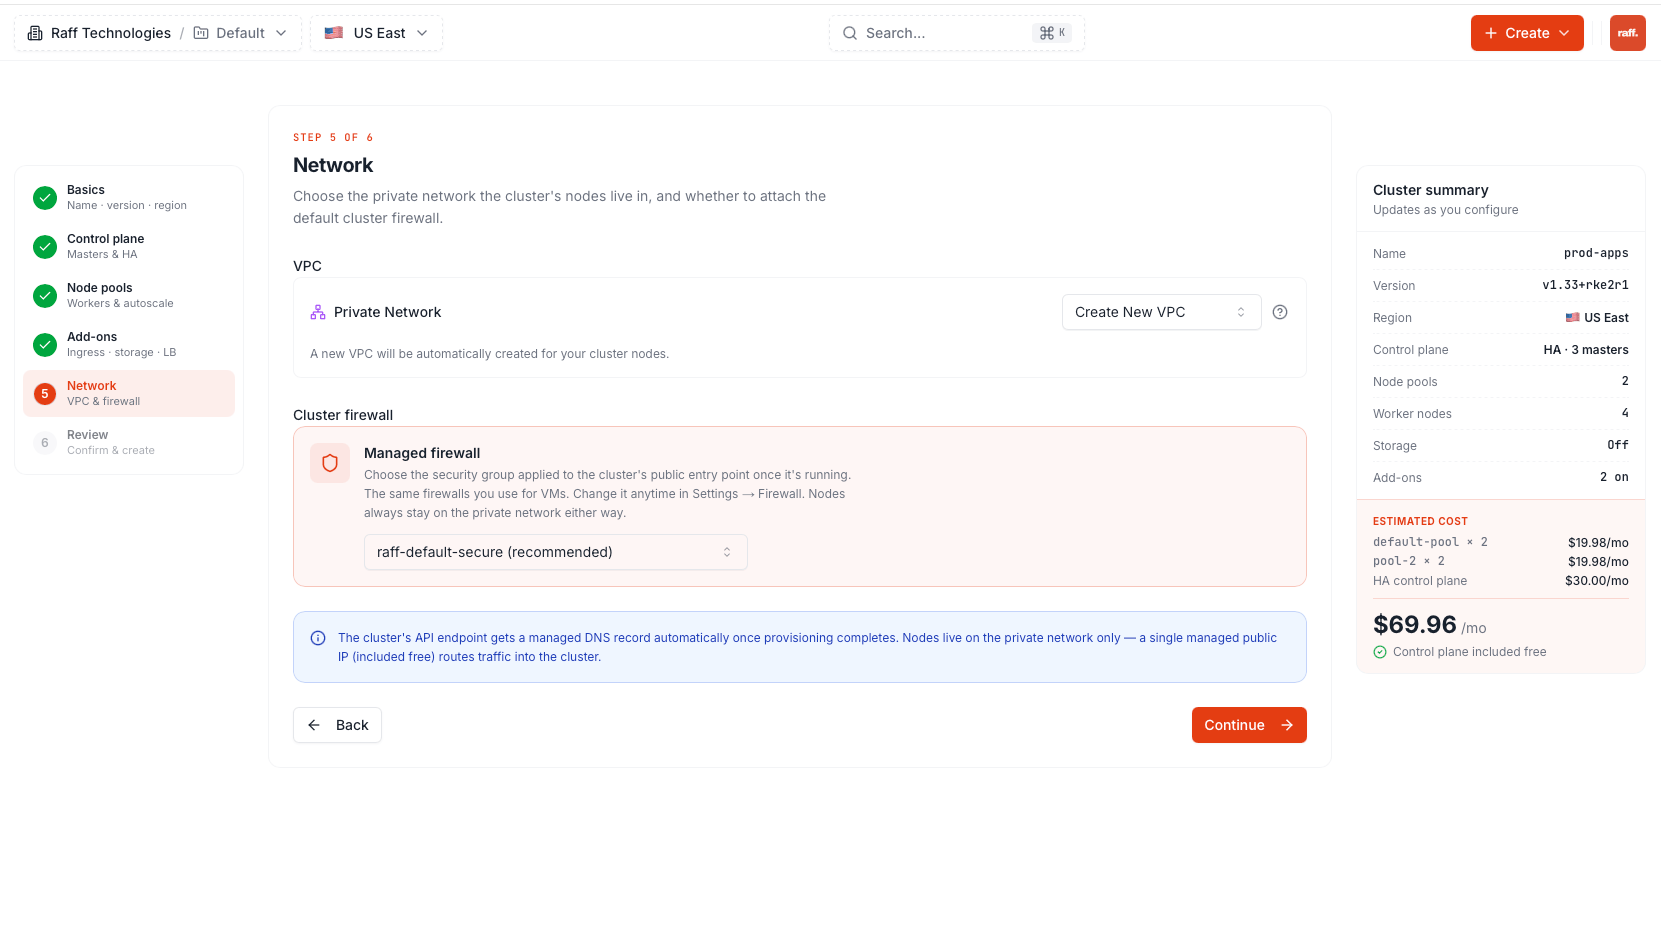
 The cluster gets its own VPC automatically, or pick an existing one. The **managed firewall** applies a security group to the cluster's public entry point — the baseline `raff-default-secure` opens 80, 443 and 6443 only. You can change it any time in **Settings → Firewall**.
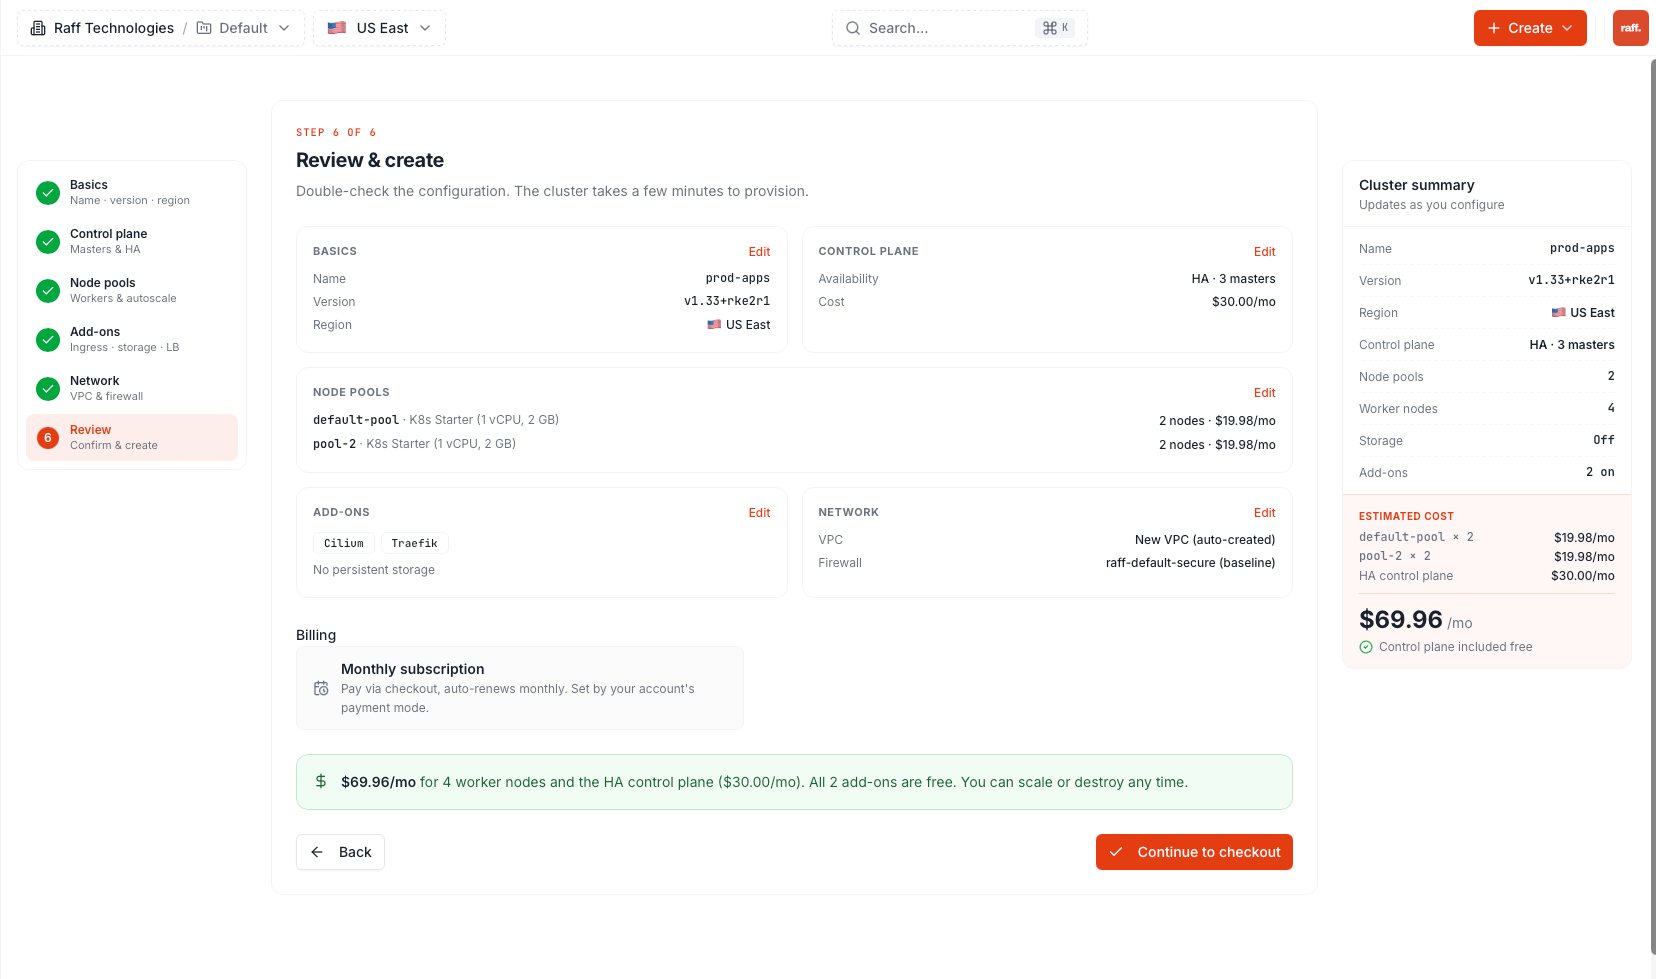
 The summary shows every choice and the exact monthly price before you confirm.
 ## Verify
The cluster page shows live provisioning events. When the status badge turns **Running** and every pool shows **running**, the cluster is ready — download the kubeconfig and [connect with kubectl](/products/build/kubernetes/quickstart-guides/connect-with-kubectl).
## Next steps
Download the kubeconfig and deploy
Automate cluster creation with the REST API
## Verify
The cluster page shows live provisioning events. When the status badge turns **Running** and every pool shows **running**, the cluster is ready — download the kubeconfig and [connect with kubectl](/products/build/kubernetes/quickstart-guides/connect-with-kubectl).
## Next steps
Download the kubeconfig and deploy
Automate cluster creation with the REST API